How do you change the configuration of a charge point?
The configuration of a charge point is kept in three places: the charge point's details in the portal, the OCPP configuration in the charge point itself, and the settings in the app or on the web page of the manufacturer. Below, you can read where to change each of them.
The charge point's details in the portal
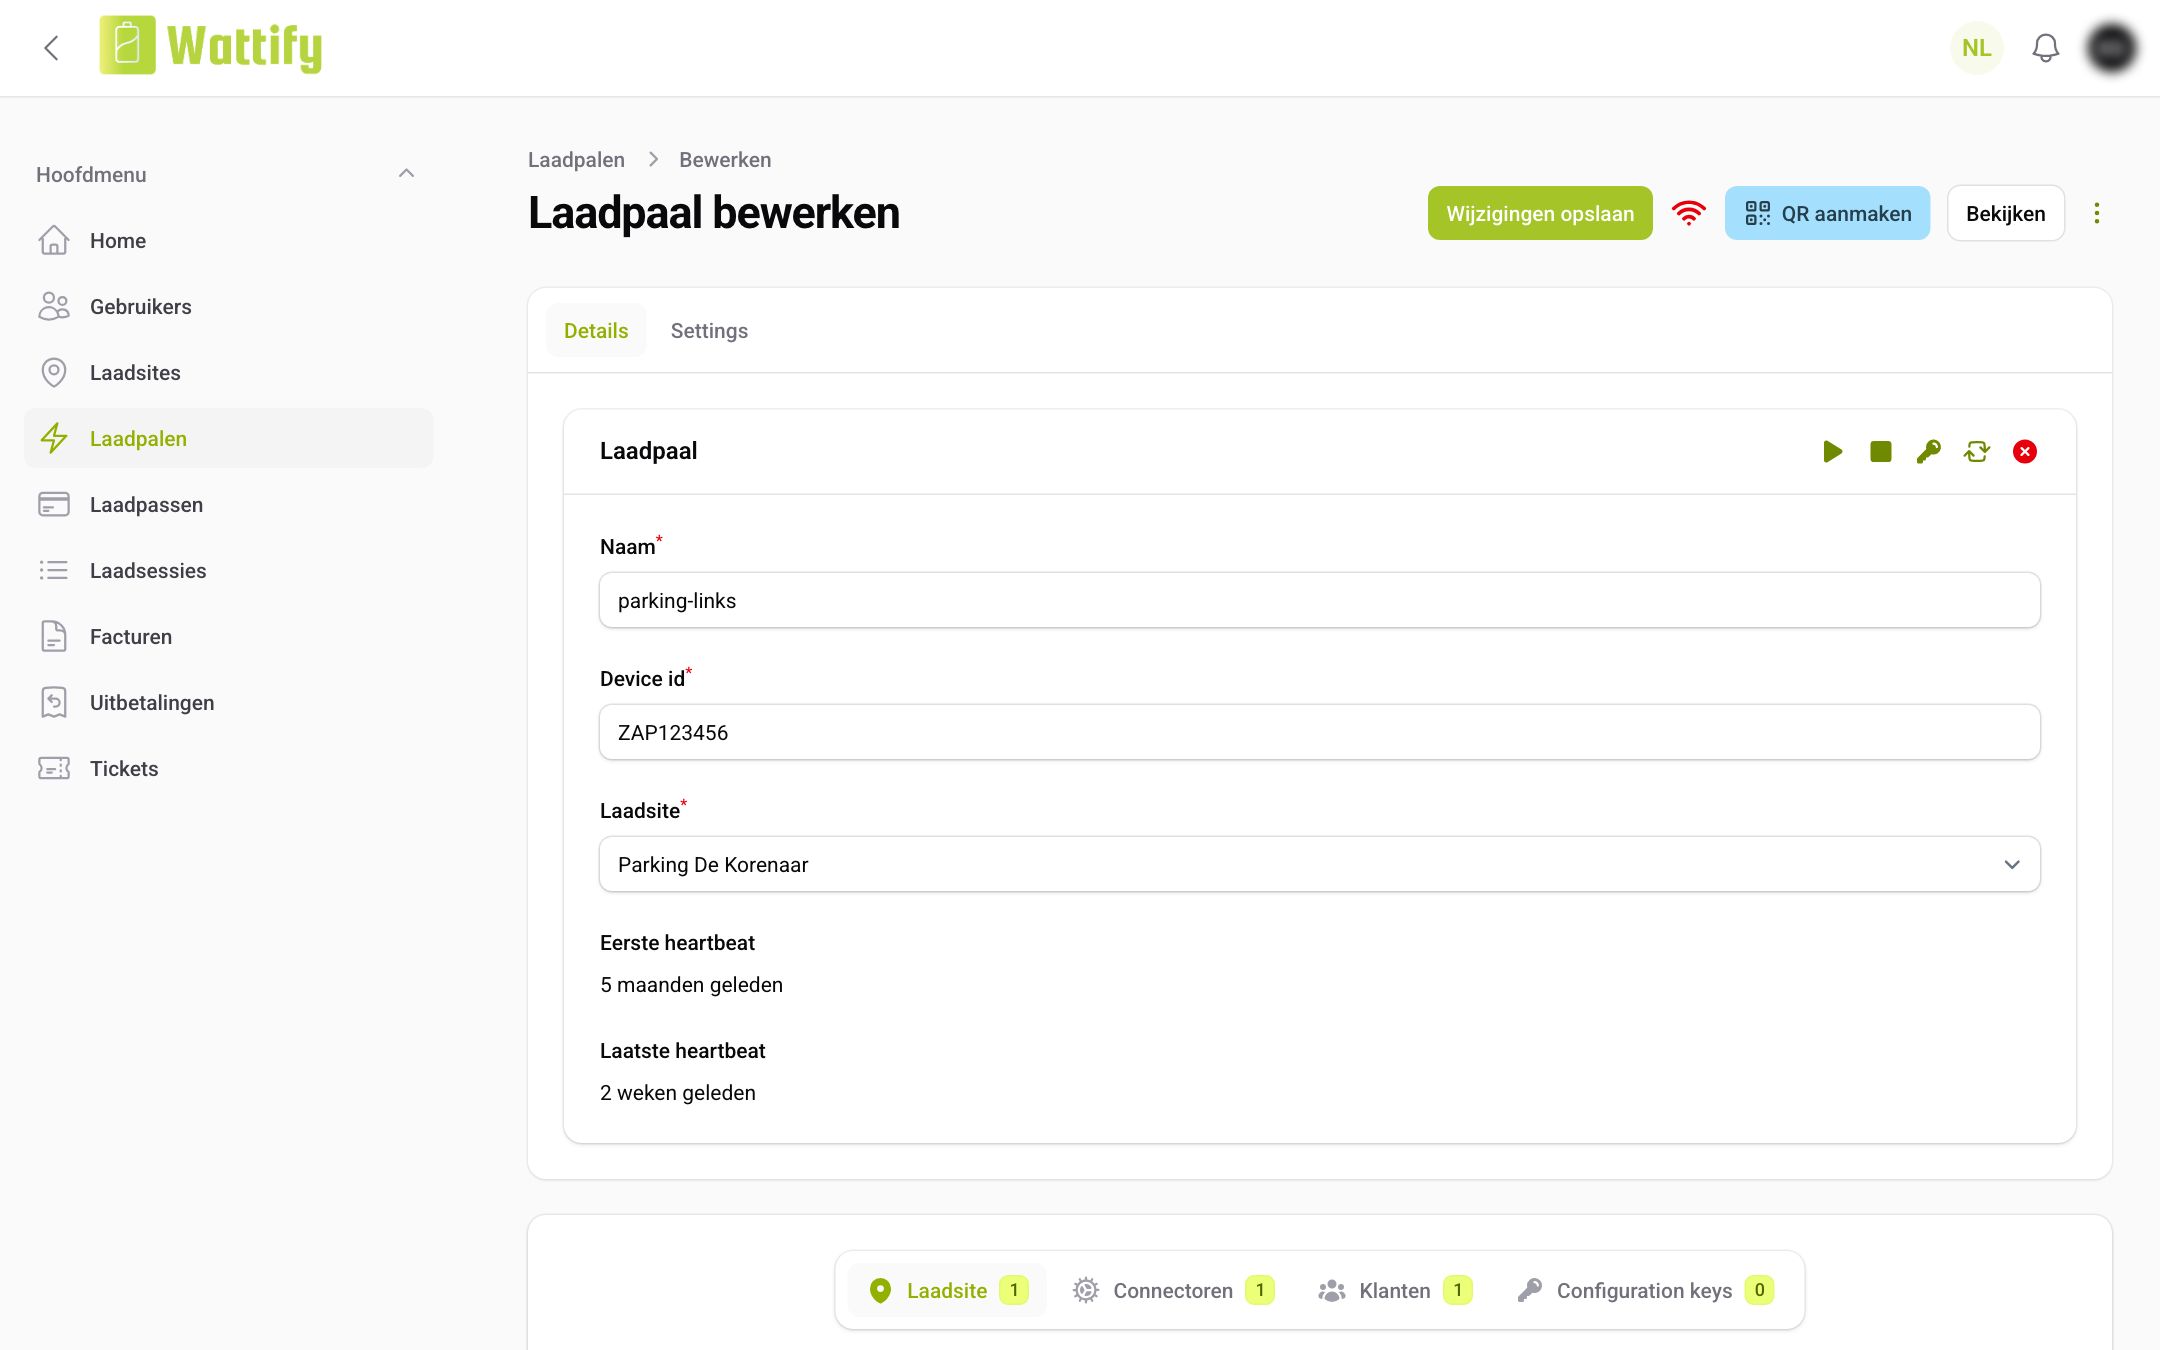
Go to Charge points, click the charge point and click Edit at the top right. On the Details tab you can change:
- Name: the name the charge point is shown under in the portal and in your overviews. Choose something you recognise on site, for example its spot in the car park.
- Device id: the serial number with which the charge point identifies itself to Wattify. Only change it when the charge point has been replaced, and copy it character for character: with a single wrong character, the charge point will no longer come online.
- Charge site: the charge site the charge point belongs to. The charge point inherits the subscription, the prices and the visibility of that charge site.
On the Settings tab is the Order field: the number used to sort the charge points of a single charge site. Then click Save changes.
The charge point's OCPP configuration
Every charge point keeps its own set of settings as defined by the OCPP protocol: how often it sends a heartbeat, whether it may accept a card when it has no connection, how often it reports meter values, and so on. As an installer or reseller, you can view and change those settings in the portal.
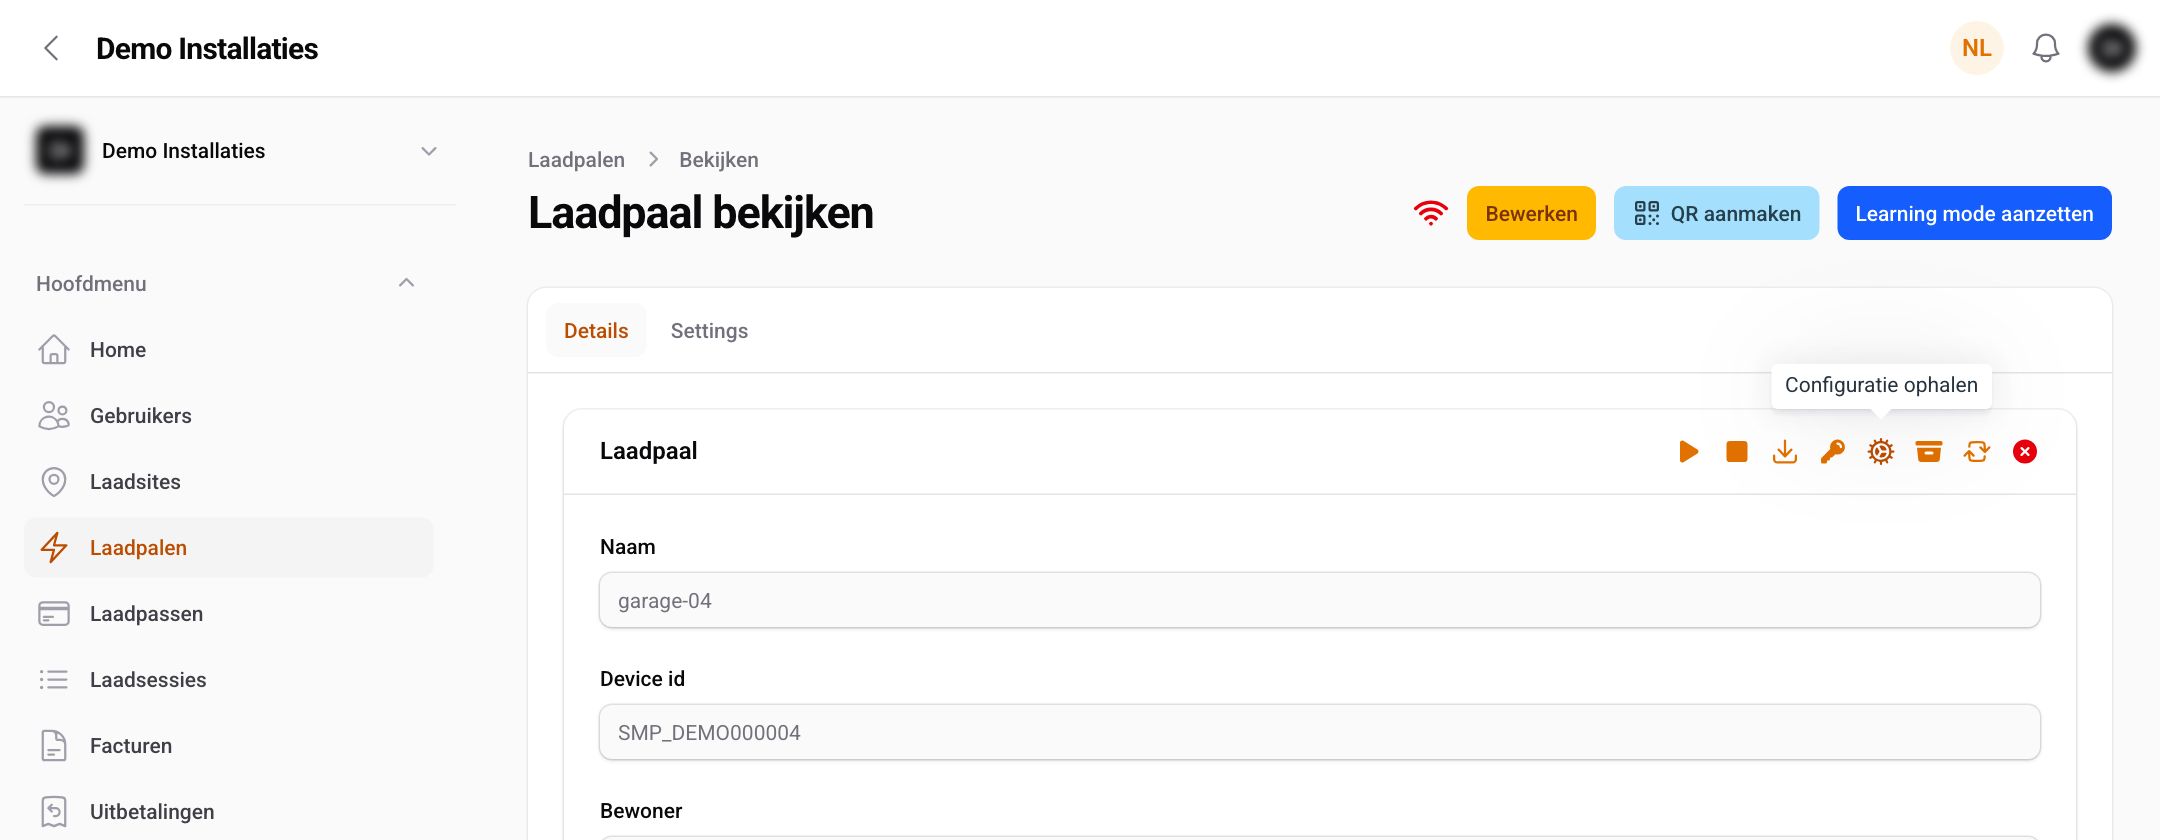
- Open the charge point under Charge points. At the top right of the Charge point block are the commands you can send to the charge point; the gear icon is Retrieve Configuration.
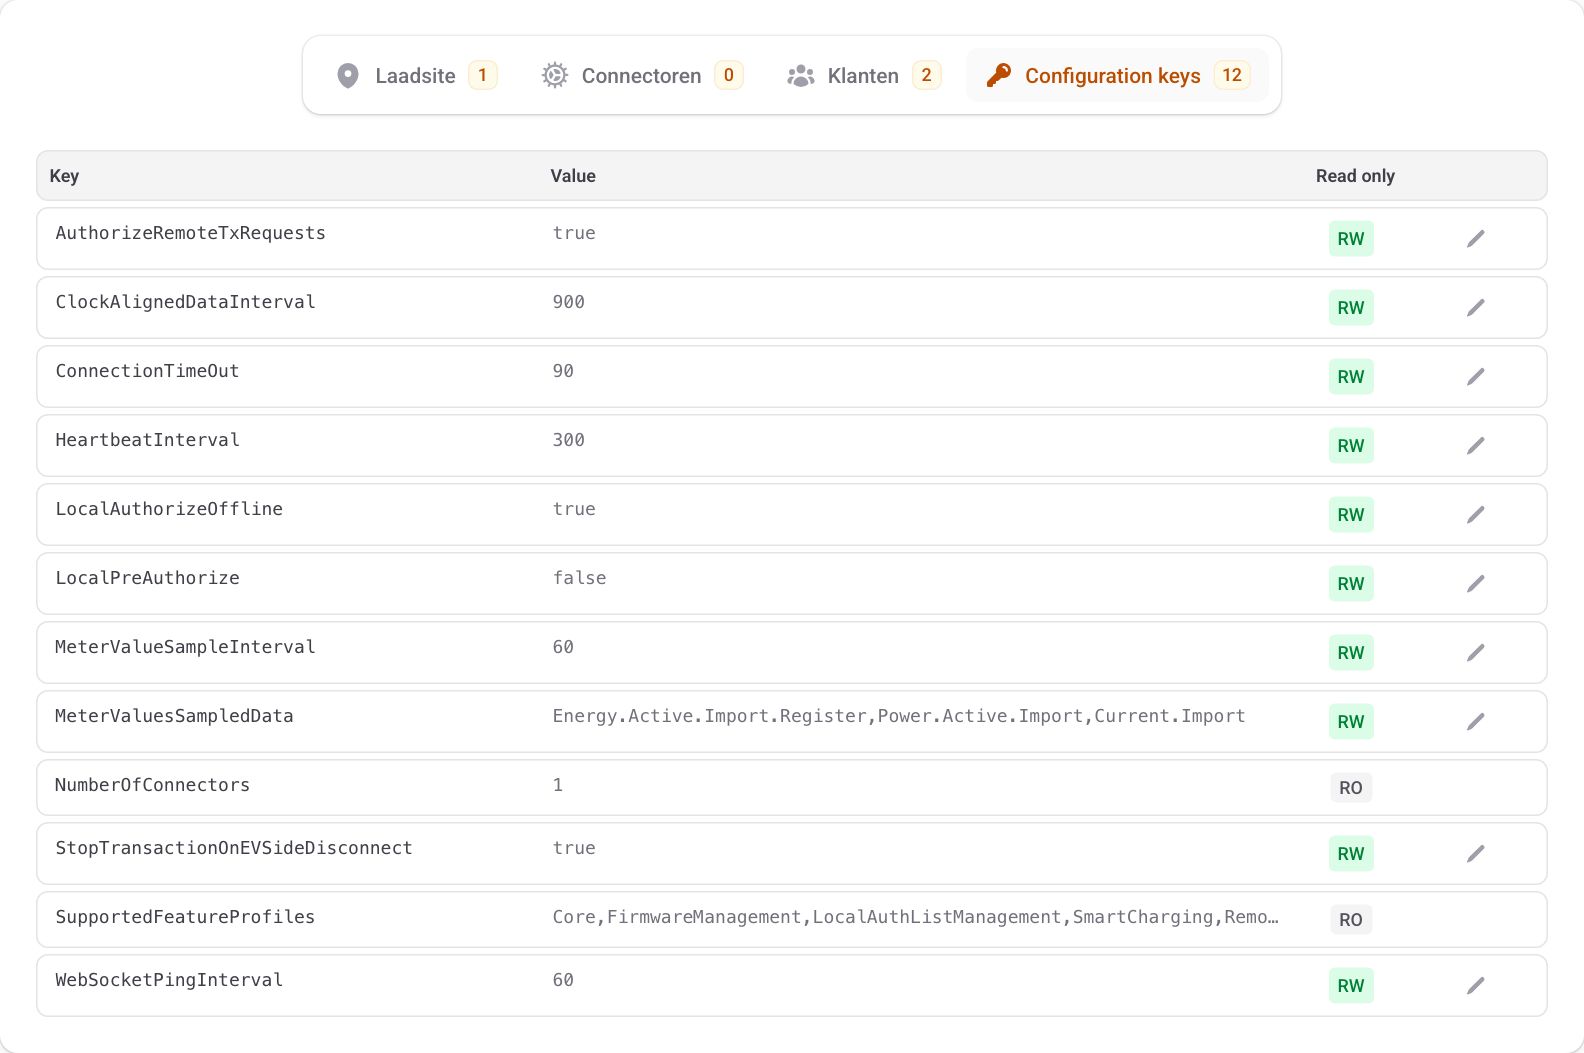
- Click Retrieve Configuration and confirm. The charge point sends back its current settings; after a few moments they appear at the bottom of the page on the Configuration keys tab. Refresh the page if the tab is still empty.
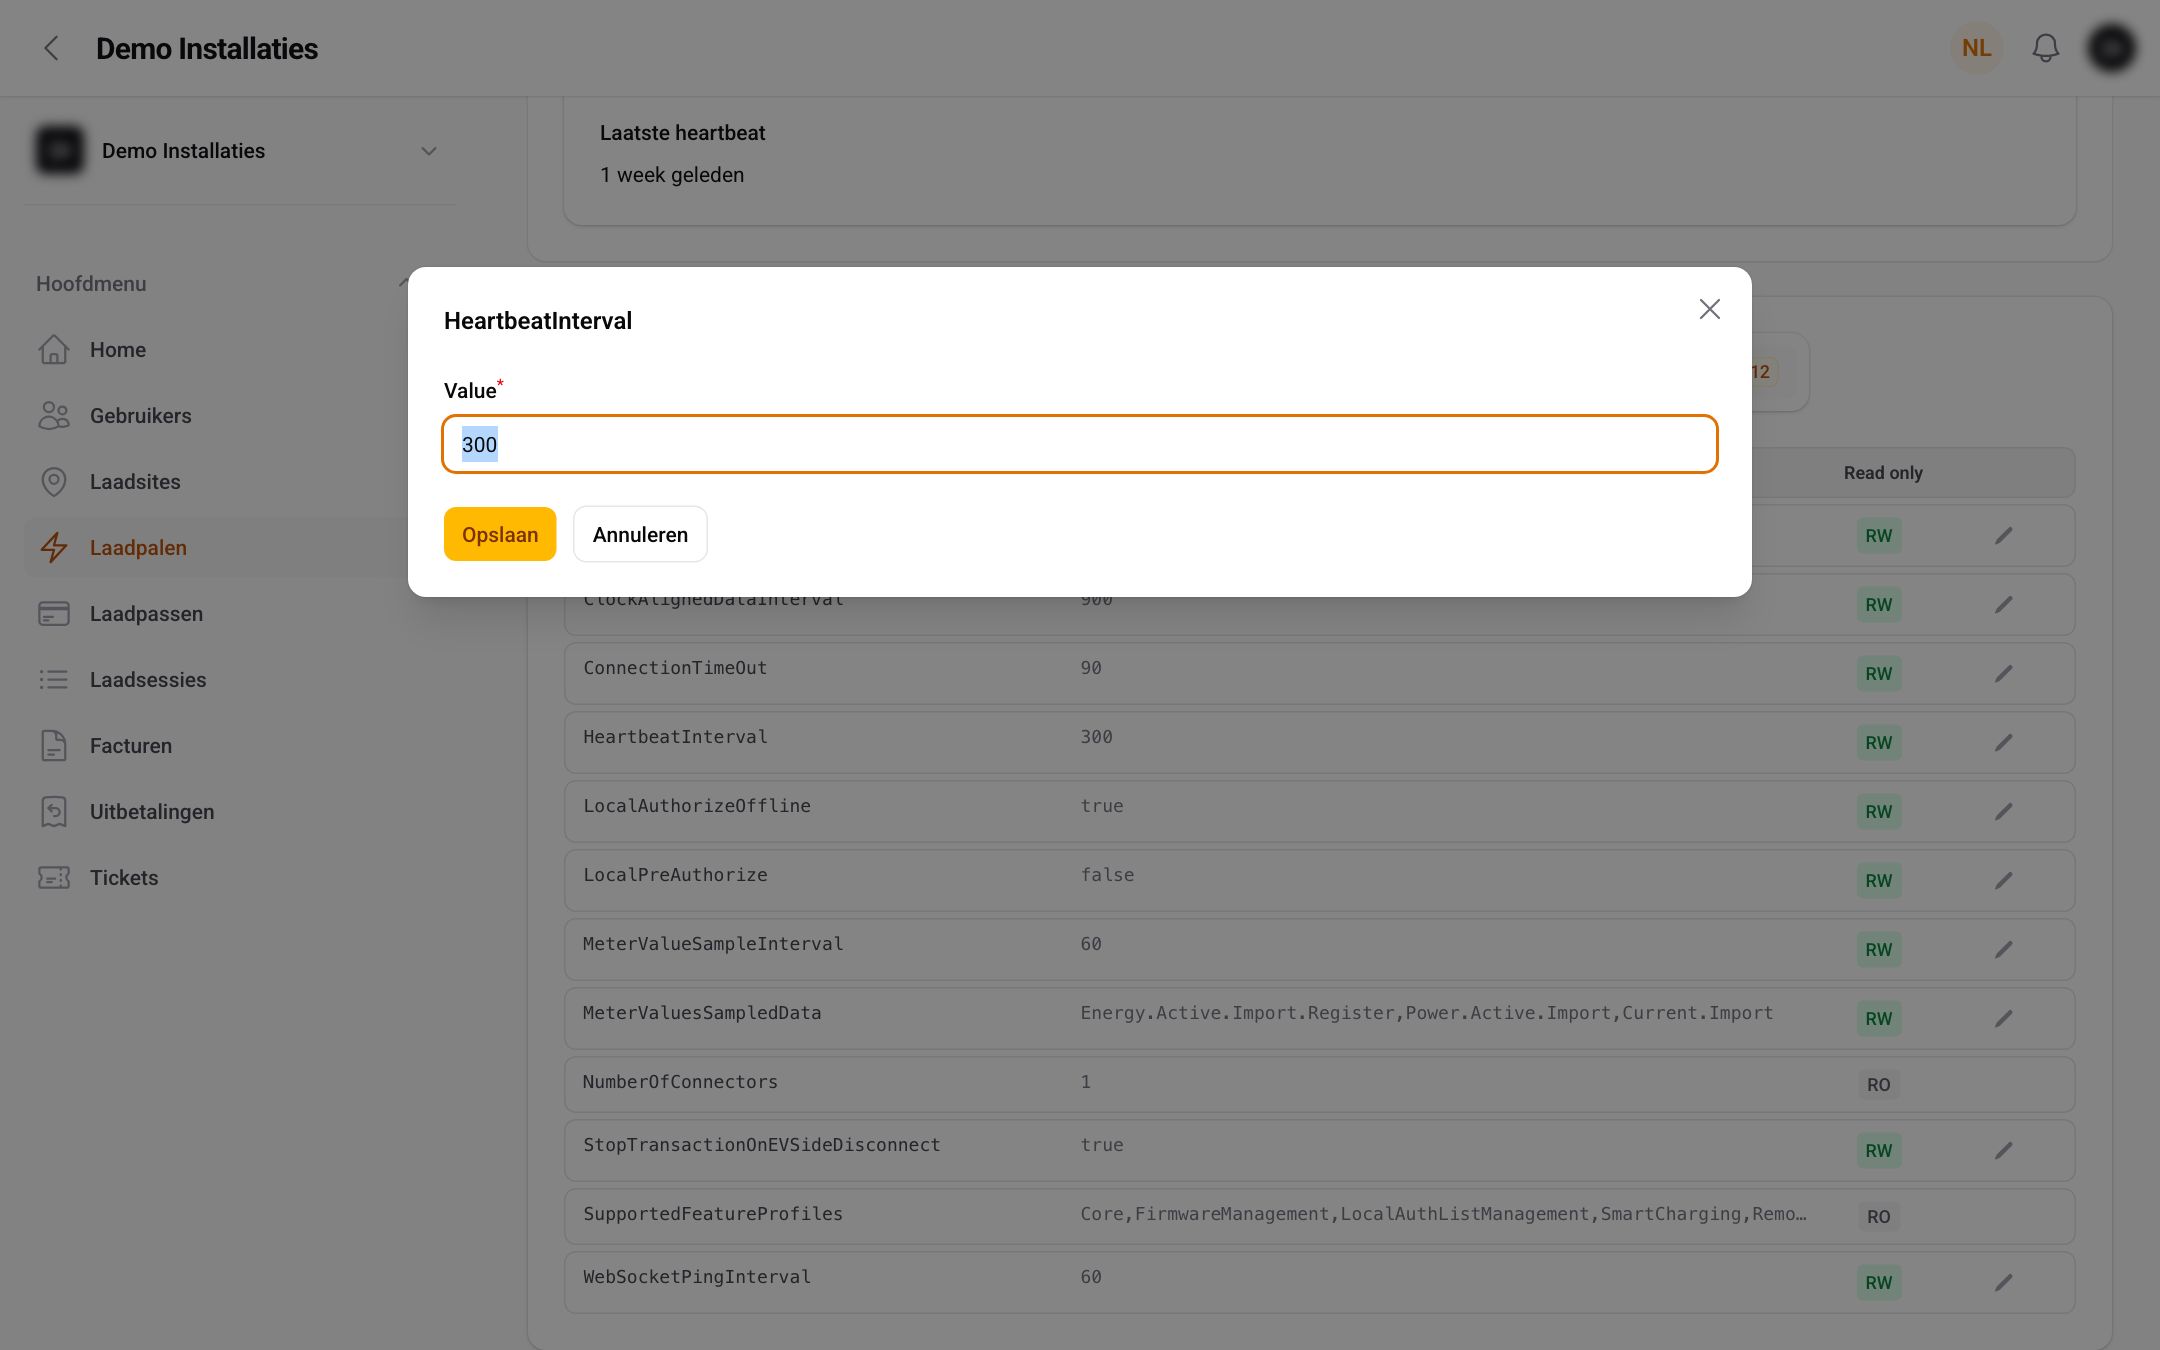
- Every setting has a key and a value. RW means you can change the value, RO that the charge point only lets you read it. Click the pencil icon next to an RW key, enter the new value and click Save. Wattify sends the change to the charge point straight away. You will see the notification Configuration key updated, or Failed to update configuration key if the charge point rejected the value.
- Some changes only take effect after the charge point restarts. In that case, send a Soft reset using the arrows icon in the same block. Any charging session in progress is ended when you do this.
Only change keys when you know what they do, and note down the old value before you change anything. A wrong value for the connection or the authorisation can take the charge point offline or make charging impossible.
Settings in the manufacturer's app
The address the charge point uses to connect to Wattify, the Wi-Fi or 4G network and most hardware settings are not configured in the portal, but in the app or on the web page of the manufacturer. The instructions for each brand are in the Set up charging station to link to CPO category.
Read more
Related articles
Did this answer your question
Thank you for your feedback
Did not find an answer?
Our team is just an email away and ready to answer your questions